
May 21st, 2021
Improve Your Energy Efficiency Using FLIR
The average American wastes an average of $200 to $400 of their approximately $2,000 annual energy bill through drafts, air leaks, and outdated heating and cooling systems. By finding where the cracks in your home are, you can save money and ultimately make your home that much more comfortable.
But sometimes it’s hard to know where those cracks and crevices are. We’ve got just the thing — borrow a FLIR thermal imaging camera from us for free to find out where the air is leaking out of your home!
In warm weather
From inside your home, reds, whites, and warmer colors show where warm air is sneaking in. From outside your home, darker, cooler shades show where cool air is leaking out.
In cold weather
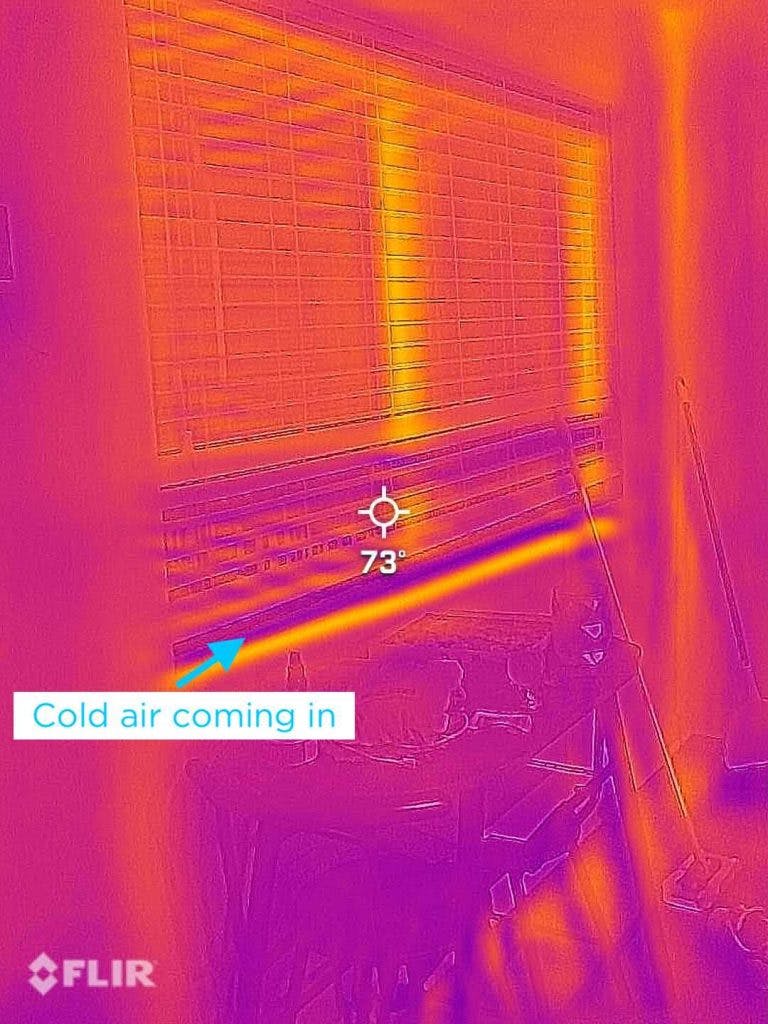
From inside your home, darker cooler spots show where cool air is wafting in. From outside your home, reds, whites, and warmer colors show where heat is leaking out.
Helpful Tips and Tricks for Preventing Air Leaks
Our UK team tried this out: we sent hundreds of these cameras to homes with surprisingly high electricity bills — our customers loved it!
For instance, Grahame captured great shots of before and after his cavity wall insulation installation. The photo below on the left shows Grahame’s house without cavity wall insulation. The bright colors indicate that a lot of his heating is leaking out through the poorly insulated walls. The photo below on the right shows Grahame’s house with cavity wall insulation. The walls are much darker in color, showing that the external walls are now colder and significantly less heat is escaping out of the house. Cavity wall insulation can save you up to $225 a year on heating bills!
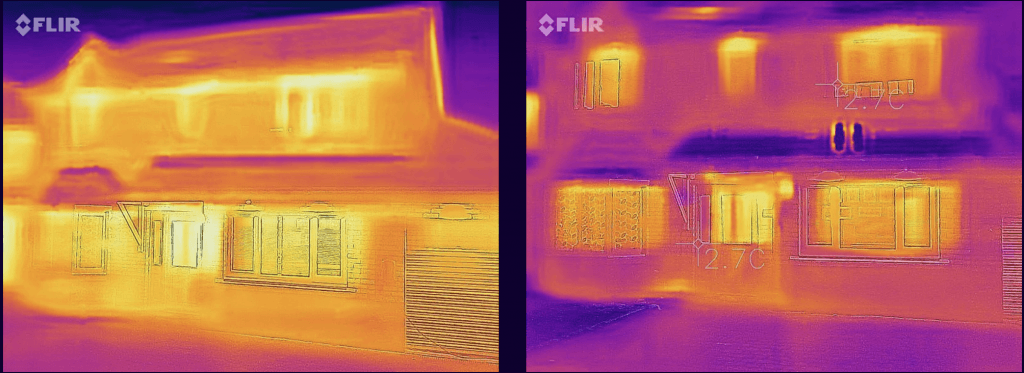
Grahame’s before and after cavity wall insulation.
In many ways, we’re a lot like these clever cameras. We’re committed to bringing you cutting-edge technologies to lower your bills and your carbon footprint. Other energy suppliers might hope you have some unsealed door frames or drafty windows. Not us.
Here are a few wallet-friendly tips on how you can reduce inside air leakage from your home:
Doors
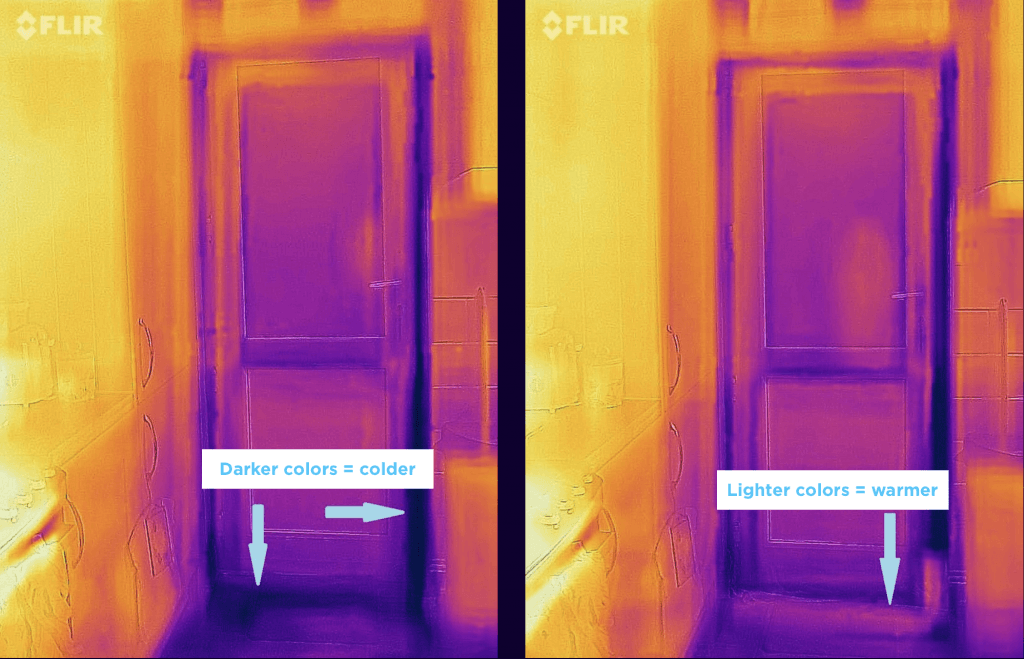
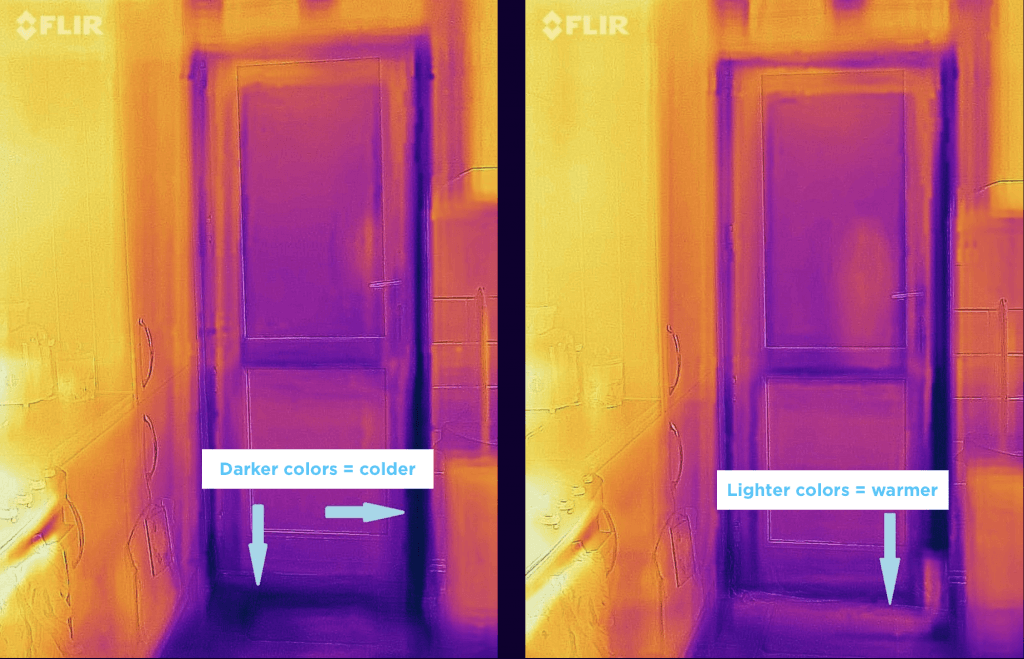
- To block drafts at the base of your doors, you can purchase a door draft stopper/sweeps or make one of your own by stuffing tights with socks, rice, plastic bags, or any spare material you have lying around. If you’re feeling a bit more creative, you can check out this tutorial, which uses a pool noodle! The first photo below shows cool colors around a door in winter, indicating that warm air is escaping! The second photo shows a strip of warmer color where the sweep has been placed.
- If you’d prefer to install a pre-made door sweep, try a brush strip or hinged-flap one (you can find them at your local hardware store).
- For drafts around the door edges, try weatherstrips or foam tape. You can also try plastic or metal strips.
- Close curtains at night to help keep inside air in and outside air out! The photo below shows the dark blue areas from the exposed window in the door during cold weather months. The photo on the right shows much warmer colors once the curtains are closed and the door is no longer exposed.
Windows
- During cold weather months, keep the curtains or blinds open during the day to allow the sun to help heat your home. When the sun sets, close the curtains or blinds to keep that heat in!
- Alternatively, in warm weather months, close the blinds or curtains to keep the heat from the sun out and open them up at night.
- You can weatherstrip operating windows. Check out this tutorial on how to do it yourself!
- You can use silicone caulking to seal drafts in windows.
- You can add secondary-glazing window insulation film to reduce heat loss in the winter.
Unused rooms
- Keeping the doors of unused rooms closed can save you a lot of money. Concentrate the air flow of the rooms you use by closing doors throughout your home.
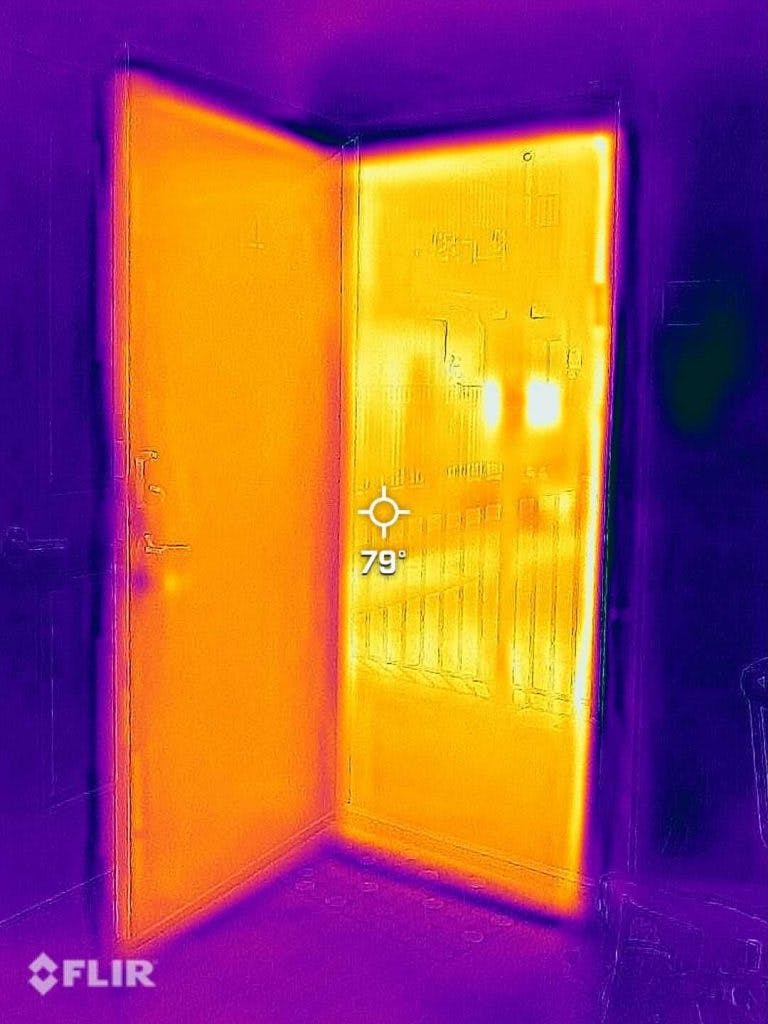
Here the front door is open to the outside air, which is hotter than inside due to air conditioning. This by shutting doors to outside spaces and within your home, you can keep cooler air inside.
Loft Hatches
- If your home has an attic and you access that via a loft hatch, you can insulate this door using a black garbage bag with any spare material you might have.
- You can also weatherproof the edges of the loft hatch to seal any gaps.
Bathroom Fans
- Leaving a bathroom fan on during the winter can help to chill your entire house. Remember to turn it off when you’re not using it.
- You can get a bathroom fan with a timer, to help make sure it’s not left on unnecessarily.
Chimneys:
- If you still use a chimney, you can buy or make your own removable fireplace guard to help reduce the draft coming in from outside. Check out a few different ideas here!
- Chimney balloons aren’t the best at blocking drafts. Try a flue blocker instead! It’ll help with insulation when you aren’t burning a fire.
- If you no longer use your chimney, consider having it professionally sealed off.
Floorboards and baseboards:
- Place rugs over exposed floorboards to reduce drafts through the gaps.
- Make sure you’ve sealed your baseboards. Remove any old caulk before adding more, then paint over it. We recommend using clear caulk, especially if this is your first time DIY-ing this!
Have a professional check your ductwork:
As much as 20 percent of conditioned air can be lost through ducts (both heating and air conditioning is lost through unkempt ductwork). Speak with a professional. Tackling this could save you hundreds of dollars in electricity costs, year round.
By checking the insulation regularly, you could save a great deal of money, year round. And that means less energy used to make your space as comfortable as it can be — definitely a win-win!
Just for you

